
So you’ve got two computers at home and one at work which you browse the internet and are constantly bookmarking your favorite sites to. The problem is that unless you copy those bookmarks to a flash drive or other media you will not be able to access the same bookmarks on all three computers. Don’t worry there is a solution.
Xmarks allows users to synchronize their bookmarks across the web. Users install the add-on for their favorite browser (currently support Firefox, Internet Explorer, and Safari), create an account that will be used to store and synchronize your bookmarks, and bookmark. That’s it. Xmarks will store your bookmark and if enabled your web site log-in information on their servers (encrypted) in case your computer crashes or if you simply want to synchronize among all of your computers.
The guide below will walk you through the installation and configuration of this wonderful add-on. If you have any questions or have a suggestion for another tool that is similar, feel free to post it below.
Note: I used Firefox 3.011 for this tutorial
Installation
Download Xmarks from the Xmarks web site
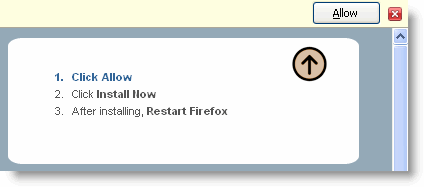
1. Before download starts you may encounter this message, click Allow so that the add-on download.
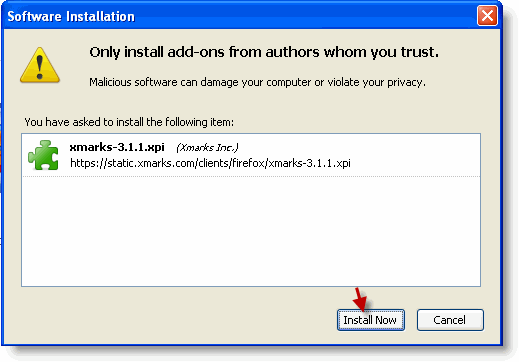
2. You will be prompted to allow installation. Click Install to proceed.
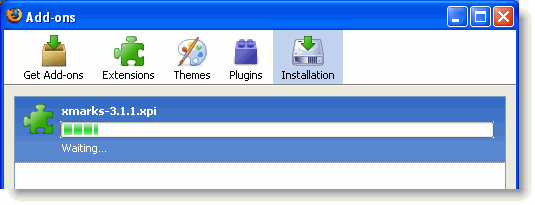
Installation Progress
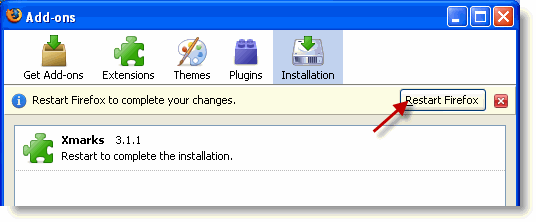
3. You must restart Firefox by clicking on the Restart Firefox button in order for installation to complete. Make sure that you save any work in any tabs before proceeding.
Configuration
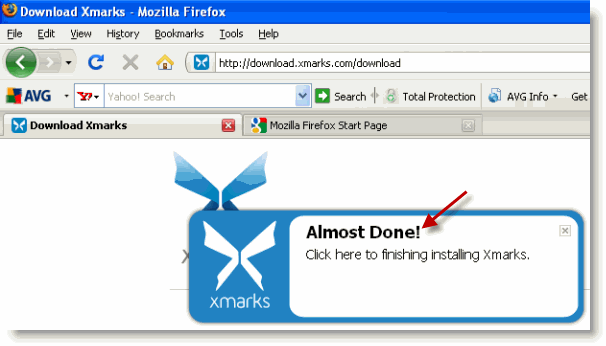
1. Once Firefox restarts you will notice that the Download Xmarks tab will also open. Click on the Almost Done! prompt to configure Xmarks.
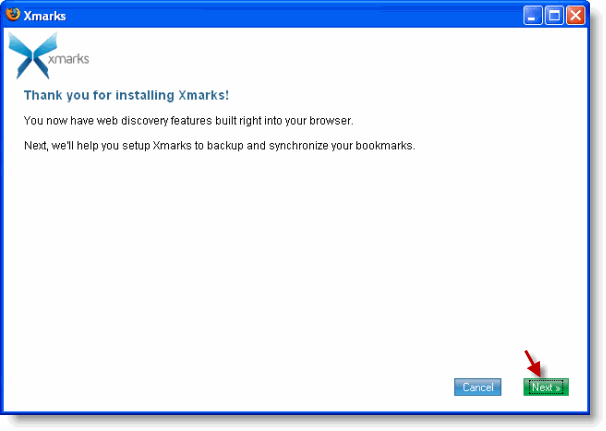
2. Click Next to Proceed with the configuration wizard.
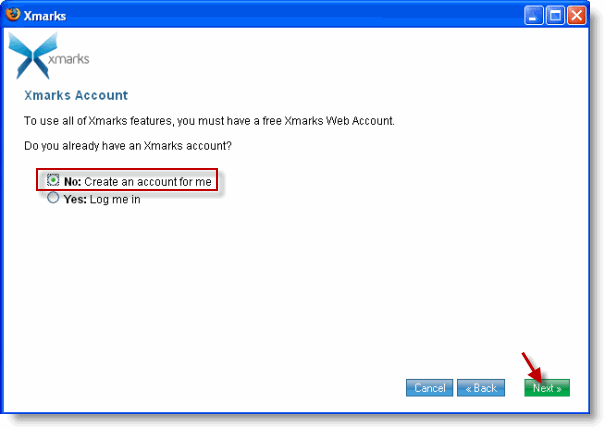
3. If you’re installing this program for the first time you most likely do not have an account. Select No. Create an account for me and click Next
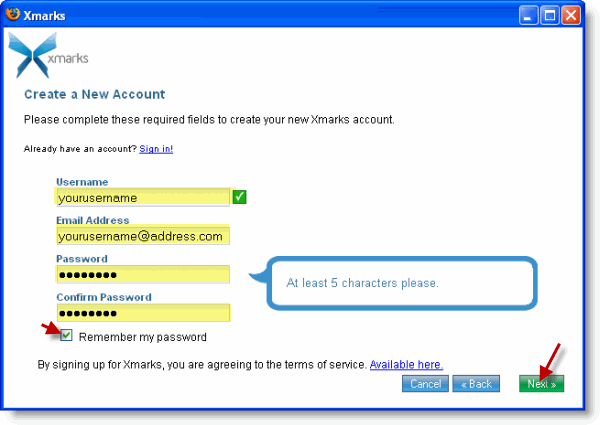
4. Enter the information for the highlighted fields above. Add a check mark to the Remember my password checkbox. Click Next to proceed.
Note: Make sure that you are installing this add-on on a private computer and not a shared/public computer.
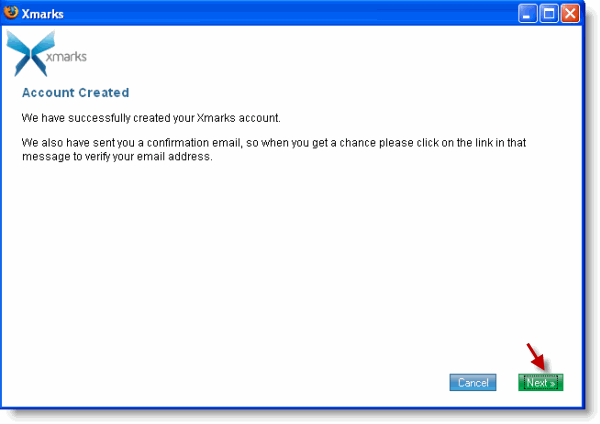
5. When you received the Account Created message above, click Next to proceed.
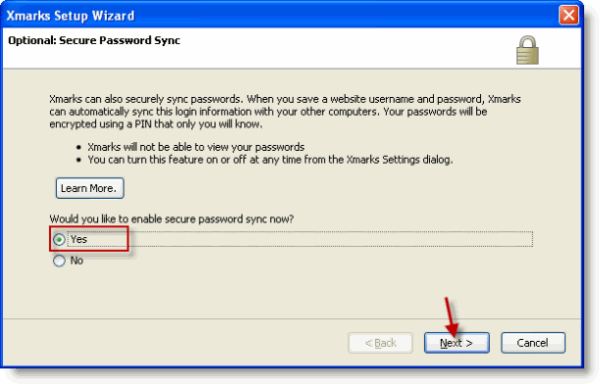
6. If you wish to use Xmarks password sync feature you can enable it by selecting Yes and clicking Next to proceed. Otherwise proceed to Step #9.
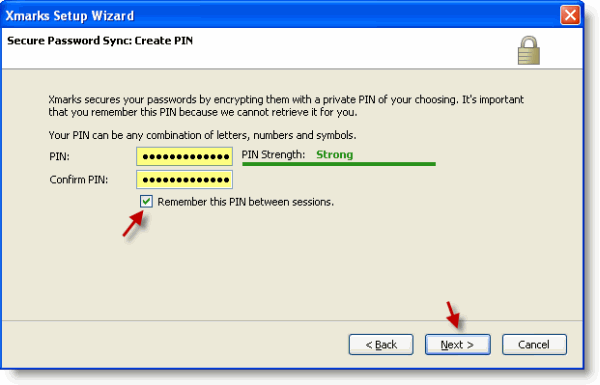
7. Enter the PIN Xmarks will use to encrypt your passwords. Make sure to add a check mark to Remember this between sessions to prevent having to re-enter the information for new sessions. Click Next.
Note: If you need help with strong passwords head on over to 8 Ways to Secure Your Privacy in the Cloud and read #3
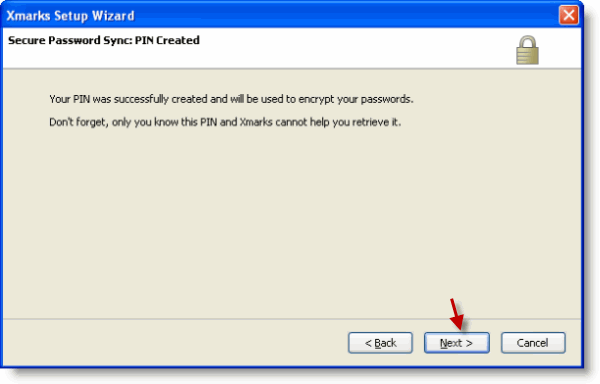
8. Click Next twice – On this screen and the next screen.
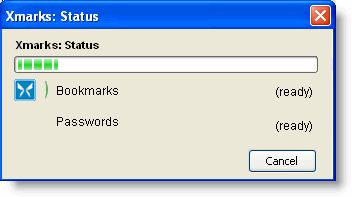
Xmarks will begin bookmark & password synchronization
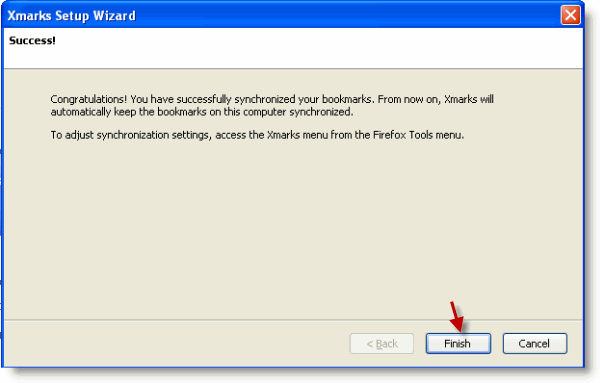
9. Congratulations, setup and synchronization have been completed. Click Finish to exit the setup Wizard.
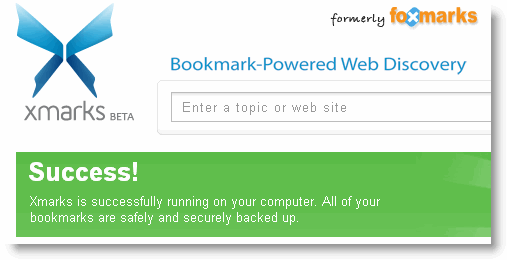
You will receive the message above when the wizard window closes.

10. To access Xmarks settings or perform an unscheduled Synchronization, click on the the Xmarks icon located on the bottom right of the browser window. Select the action you wish to perform.
Note: The screen shot above was taken of Xmarks on Firefox
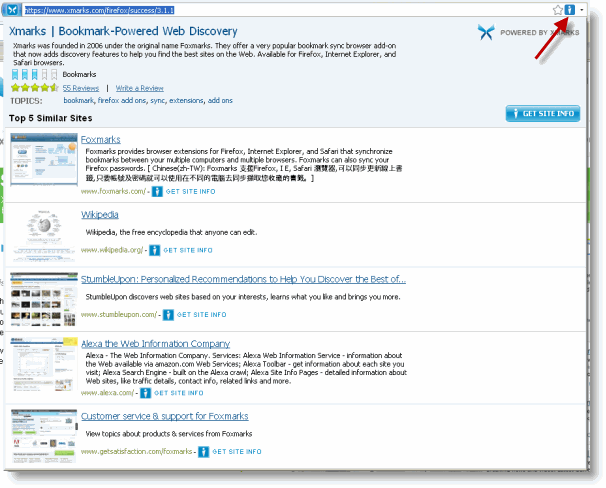
If you click on the Xmarks icon located at the far right of the browser address bar you will receive information about the web site and other related sites.


