If you create spreadsheets in Excel and would like a way to ensure that data entered by others is consistent, you can use data validation lists to specify the items that can be entered into a specific cell. Data Validation lists work by allowing users to specify a list of data that is allowed in a specific cell. In this tutorial we will work with a list that will be used as a reference for a drop-down cell that we will create. If you have any comments or questions about this feature, feel free to post them below.
Note: I used Excel 2007 when creating this tutorial.

The cells located in the Type column draw the contents of their list from the Asset Type column in the illustration above.
Once you complete this how-to you will be able to use a list as a reference to create a drop-down that will control the data that can be entered in a specified cell.
Create Data Validation Rule
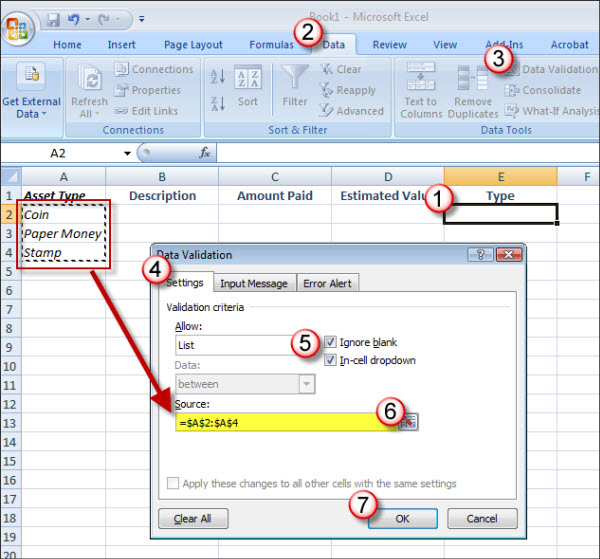
1. Select the cell you wish to apply the validation list to.
2. Click on the Data tab located in the Office Ribbon
3. Click on the Data Validation button located in the Data Tools group
4. When the Data Validation Dialog box appears, click on the Settings tab (should be the default tab)
5. Select List from the Allow: drop-down menu
6. Specify the entries you wish to appear on the list, you can specify the range by typing it in or simply highlighting it.
7. When you are done, click OK to close the dialog box.
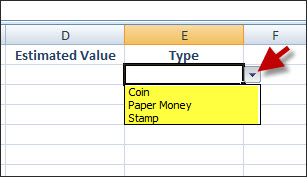
Now the cell you selected will offer you a drop-down that will list the items you specified on Step 6.
Paste Validation List to Other Cells
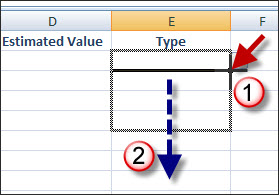
1. Click on the cell you just applied the validation list to and click on the Fill Handle (the bottom right corner of the cell – your cursor should change to a + sign).
2. Drag the fill handle down to all the cells you wish to apply the list to.
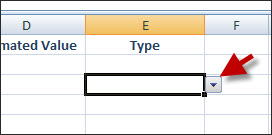
Now all cells you specified will have a drop-down linked to the list we specified in Step 6.
Remove List Validation
The steps below will walk you through the process of removing the list validation that we added in the previous steps.

1. Click on the cell with the list validation.
2. If you are not there already, click on the Home tab on the Ribbon
3. Click on the Find & Replace button
4. Click on Go To Special… from the menu

5. When the Go To Special dialog box opens, select Data Validation
6. Then select Same
7. Click OK to proceed.
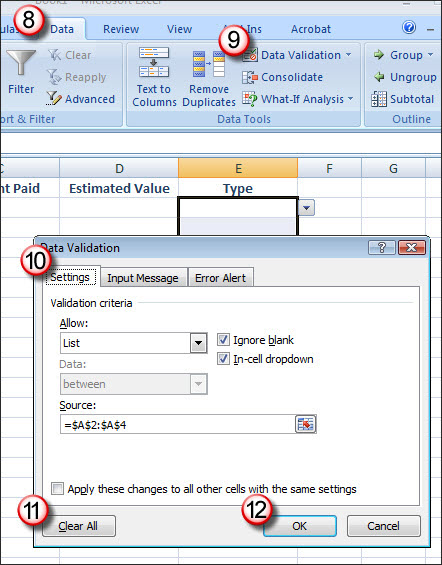
8. Click on the Data tab in the Ribbon
9. Click on the Data Validation button located in the Data Tools group.
10. When the Data Validation dialog box opens click on the Settings tab (should be default).
11. Click on the Clear All button to clear all validation criteria
12. Click OK.

