If you ever feel adventurous with your Windows 7 PC and want to tweak the registry or other system files, you might want to first create a restore point, should things go South. Windows 7 does a pretty good job of creating restore points when new software is installed, however if you are manually installing software or manipulating system files, you’re better off creating a restore point before proceeding.
If you are not familiar with restore points in Windows 7, you should know that they are simply snapshots of your computer that are saved should you ever have a problem with a program or driver you install. If you ever need to restore your computer to an earlier date using a restore point, follow the How to Perform a System Restore in Windows 7 guide.
Note: I used Windows 7 Ultimate in this how-to.
Create a Restore Point in Windows 7
1. Click on the Orb to open the Start Menu.
2. Right-click on Computer.
3. Click on Properties from the menu.
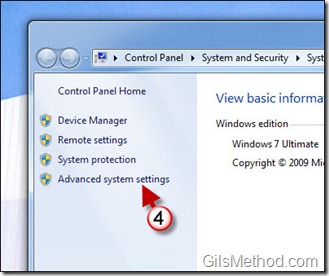
4. When the System window opens, click on the Advanced system settings link on the left pane.
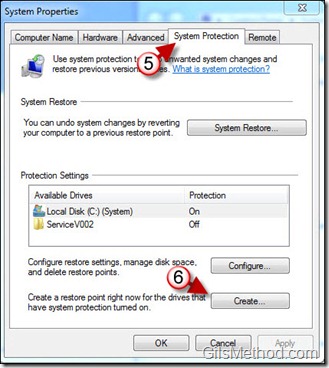
5. When the System Properties window opens, click on the System Protection tab.
6. Click on the Create button located on the lower section of the window.
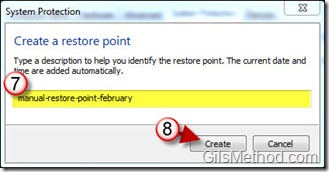
7. Name the restore point, use something descriptive.
8. Click on the Create button to begin the process.
Restore point creation…
9. Click Close when completed.
You have successfully created a restore point for your Windows 7 PC.


