Wouldn’t it be nice to use your iPad to watch DVD’s on your next flight? If you have a ton of DVD’s with family videos, compilations, and other films, you can use Handbrake or DVD to iPad Converter to rip and convert your DVD’s to the appropriate iPad format so that you may enjoy your favorite movies on the go. The tutorial below will show you how you can copy and convert your DVD’s to your iPad.
Do you own an iPad? You might want to look into protecting your investment with invisibleSHIELD screen protectors. If you are looking for more iPad how-to’s, tips, and help visit our iPad page.
Before you begin make sure to download a copy of DVD to iPad Converter and install it. You can download a copy from here.
Note: Free version is limited to 5 minute clips, worth trying before purchasing.
1. Click on Load DVD to open the menu.
2. Click on Load DVD from the menu.
Note: If you have the DVD saved to your computer, you would choose DVD File or IFO instead.
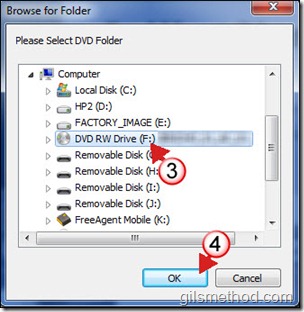
3. Select the DVD drive/folder.
4. Click OK.
Loading DVD…
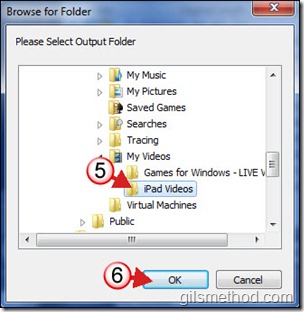
5. Select the destination folder.
6. Click OK to save the selection.
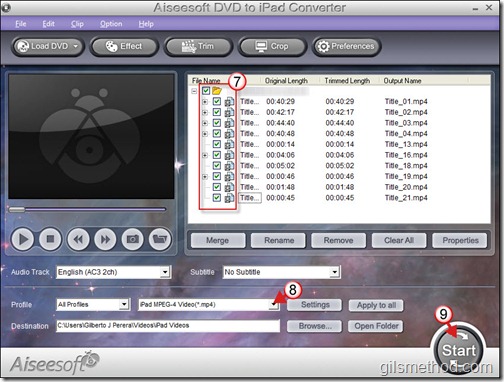
7. Select the Titles you wish to include in the conversion.
Note: Depending on the DVD you are attempting to convert, you may have multiple titles. In the case above the titles with 40 minutes or more represent each episode in a three part series. If you are working on a Movie DVD you will usually have a single title that runs the length of the movie. This is the one you should select, the other titles contain menus, extra features, etc. You’ll need to experiment a bit to figure out what’s what. Also note that the titles contain the individual chapters.
8. Once you have selected the titles, make sure that the correct format is chosen, click on iPad MPEG-4 from the Profile menu.
9. When you are ready to begin conversion, click on Start.
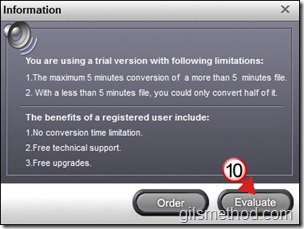
10. If evaluating the software (using the free version), take note of the limitations and click Evaluate to continue the conversion.
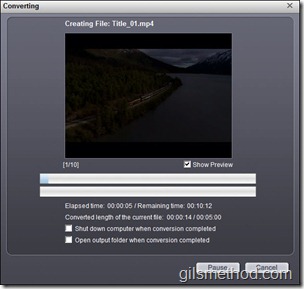
Conversion in Process
When the conversion is completed follow the instructions in the section titled: Sync Movies to Your iPad.
Program 2: Use HandBrake for Windows or Mac
Download and install Handbrake on your computer. The Windows version was used in this tutorial.
Note: Handbrake is free software, but does not have the ability to decrypt DVD’s if they are encrypted with copyright protection.
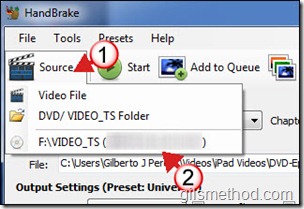
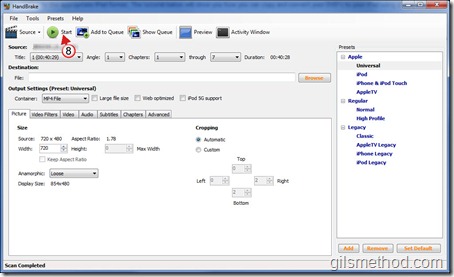
1. Click on Source.
2. Click on the DVD drive containing the disc you wish to copy (HandBrake automatically identifies the DVD in your computer).
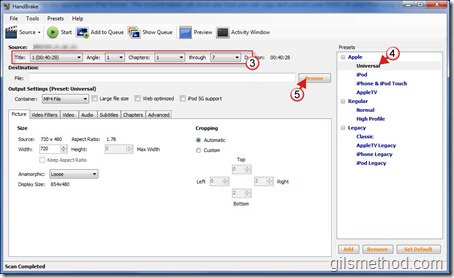
3. Select the Title you wish to copy, set the number of Chapters to include in the conversion.
4. Click on Universal from the Presets list.
You might want to customize the conversion settings using the following presets:
Conversion settings below via – ZeroSignal.co.uk
Output Settings
- Format: MP4 File
- Large file size: Uncheck (maintains device compatibility)
- Web optimized: Uncheck (unnecessary)
- iPod 5G support: Uncheck (we don’t need to support this for iPad encodes)
Video Tab
- Video Codec: H.264 (x264)
- Framerate: Same as source
- 2-Pass encoding: Check (leave unchecked if you don’t mind a very slight quality degradation (see analysis)
- Turbo first pass: Check if 2-Pass is checked (the quality difference is unnoticeable)
- Quality: Average bitrate (kbps) set to a value between 768 and 1500, depending on quality desired (see analysis)
Audio Tab
- Audio Codec: AAC (CoreAudio)
- Mixdown: Stereo
- Samplerate: Auto
- Bitrate: 128 Kbps
Adam Collyer at ZeroSignal.co.uk has more details on these settings along with additional information on converting videos for the iPad.
5. Click on Browse to specify the save location for the file created.
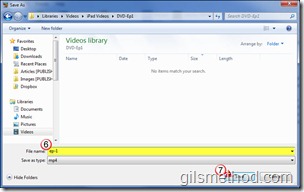
6. Locate the folder you wish to save the file to and enter a name for the file.
7. Click OK.
8. Click on Start to begin the conversion process.
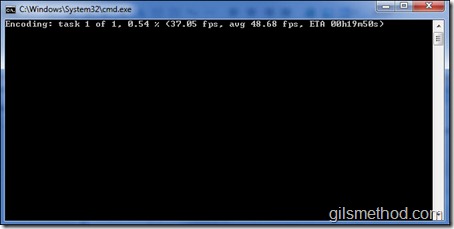
A separate Command Prompt window will appear displaying the conversion in progress.
Encoding completed. When the conversion is completed follow the instructions in the section titled: Sync Movies to Your iPad.
Sync Movies to Your iPad
Now that you have your DVD’s converted and saved to your computer, we are going to transfer those movie files to your iPad.
Before we begin, open iTunes.
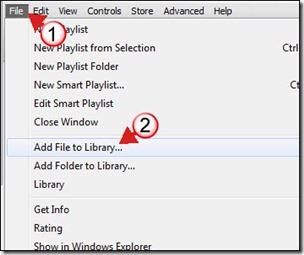
1. Click on File.
2. Click on Add File to Library (individual files) or Add Folder to Library (multiple files).
3. Select the File or Folder you wish to add to the iTunes library.
4. Click Open.
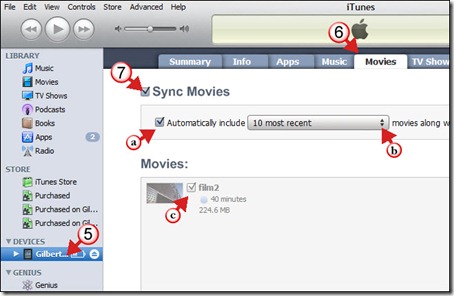
5. Click on the iPad beneath Devices.
6. Click on the Movies tab.
7. Click on Sync Movies to enable synchronization.
a. Click on Automatically include –
b. Select the criteria you wish to use.
c. If you wish, you can select the individual movies to synchronize.
8. When you are done, click on the Sync button.
Once the iPad is Synced you will be able to enjoy your movies on the go!


