
This is the second part of a larger series that I will be publishing in the coming weeks covering my switch from Outlook to Google’s online services. The intent of this series is to help others who have found themselves wanting more out of their email and calendar applications. This guide specifically covers the transfer of Outlook contacts to Gmail online. There are quite a few steps in this process so take your time and make sure that you follow it closely, this will ensure a successful transfer. If you know of an easier way to transfer your contact information to Google or have any questions, please post them below.
To view the how-to describing the process for transferring appointments from Outlook to Google Calendar, follow this link.
Note: I used Outlook 2007 for this guide.
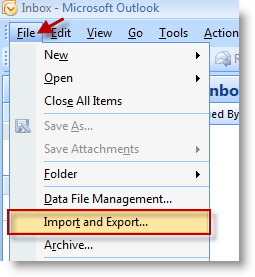
1. Open Outlook. Click on File > Import and Export…
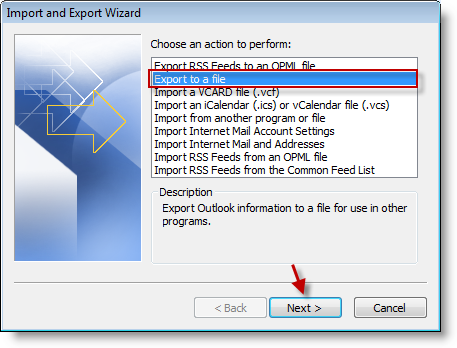
2. Click on Export to a file from the list and click Next
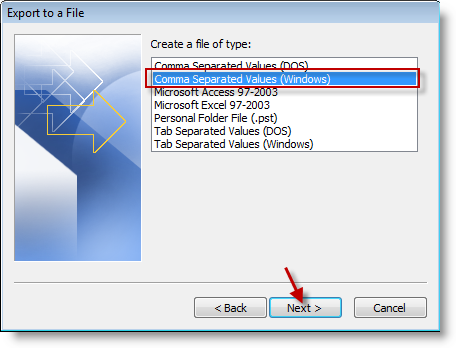
3. Select Comma Separated Values (Windows) from the menu, click Next.
Note: Make sure to select the file type for Windows
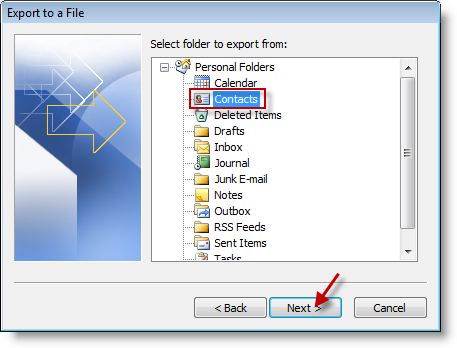
4. Select the folder to export from, in this case we will be exporting from the Contacts folder. Click the Contacts icon and click Next.
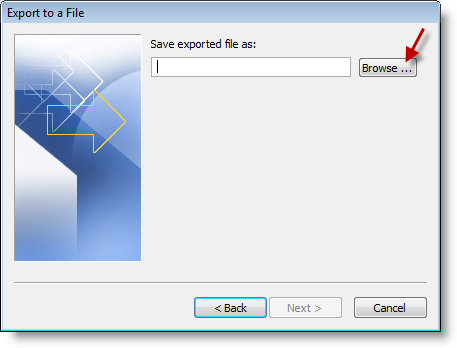
5. Click on Browse to select the directory where you would like to save the file.
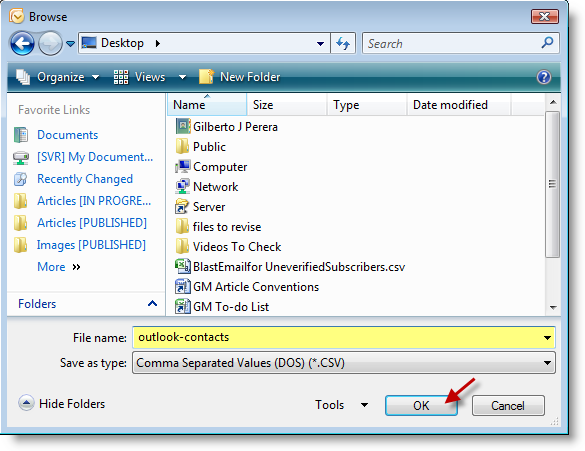
6. Name the file (outlook-contacts) and click OK.
Note: You can name the file whatever you like. I named it this way because it makes it easier to find.
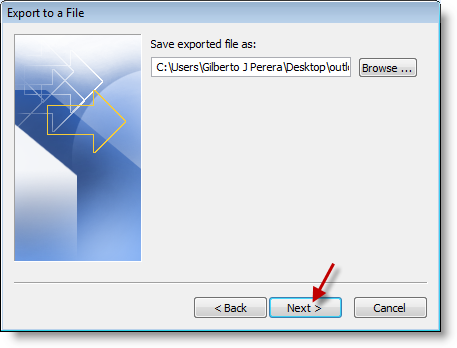
7. Click Next to proceed.
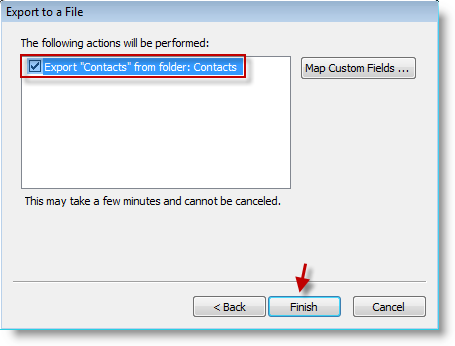
8. Make sure that Export "Contacts" from folder: Contacts is selected. Click Finish.
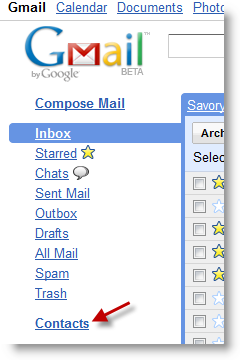
9. Head over to Gmail and sign on to your account. Locate and click the Contacts link located on the left pane.
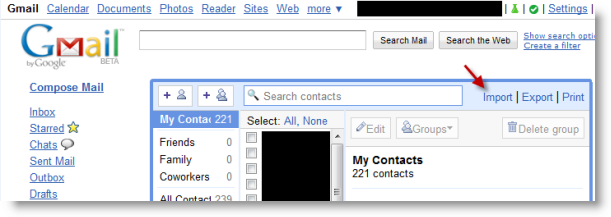
10. When the Contacts page opens, click on the Import link located on the top right corner.
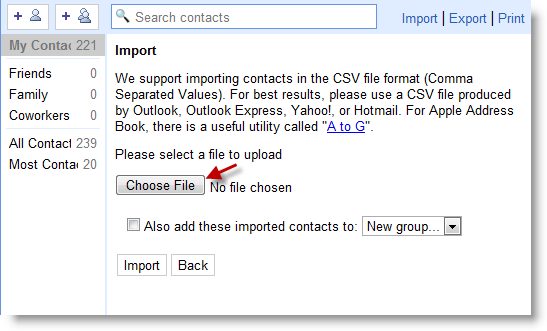
11. Click on the Choose File button to locate your exported file.
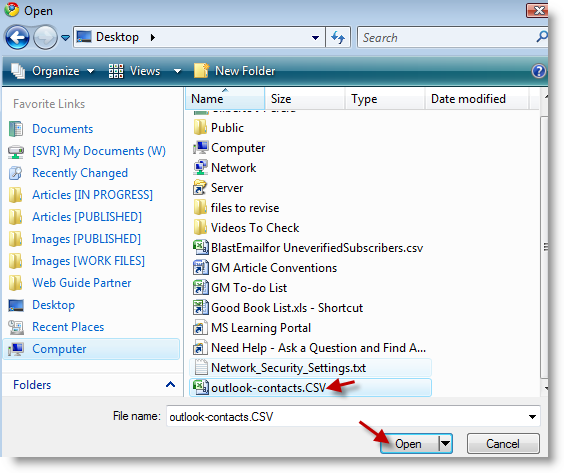
12. Locate the file you exported (in this case outlook-contacts.csv) and click on the Open button.
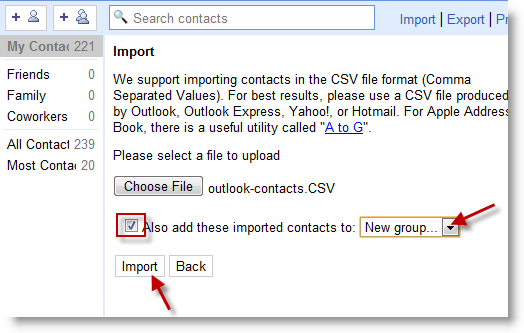
13. Add a checkmark to the Also add these imported contacts to: checkbox. Select a group from the contact groups drop-down menu, click on the Import button to process the file.
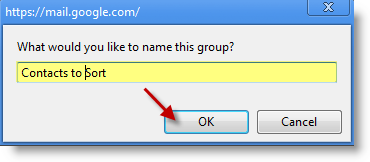
14. If you selected New group from the groups drop-down menu you will be prompted to enter a group name. Enter the name you wish to assign to this group of contacts and click OK.
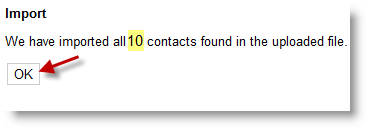
15. You will be provided with a summary of the contact import, verify that there are no errors, click OK to proceed.
You have successfully loaded your contacts to the cloud, now you can access them from any computer or mobile device with internet access.


