Unless you are using an application like Little Snitch on your Mac chances are you’ve been using your Mac without a firewall since you purchased it. Believe it or not, Apple does ship Mac OS with a firewall, however the firewall is disabled by default. If you would like to have more control over which applications accept and make connections to internet on your Mac you should definitely follow the instructions below to enable the firewall in Mac OS X.
Software/Hardware used: Mac OS 10.6.

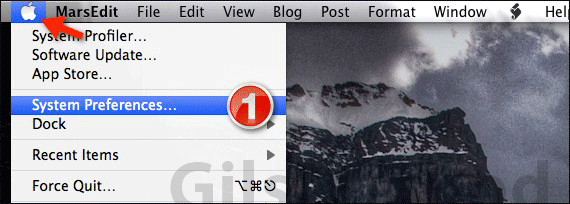
1. Click the Apple menu and then click System Preferences.

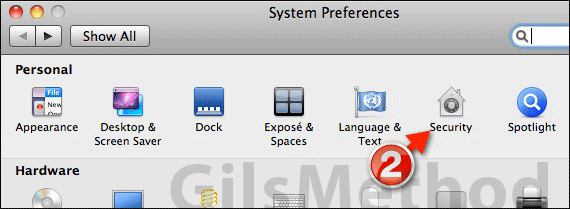
2. Click Security in the Personal row.

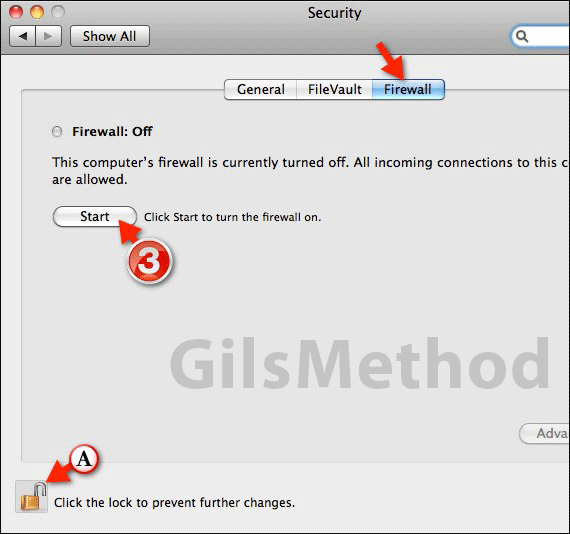
3. Click the Firewall tab and then click Start. Your firewall is now active. If you wish to customize it further follow the instructions below.
A. If the Start button is grayed you may need to authenticate your account on your Mac in order to make these changes. Click the padlock icon and enter your Mac password when prompted. The Start button should now be accessible.

B. Click Advanced to customize how the firewall works on your Mac.

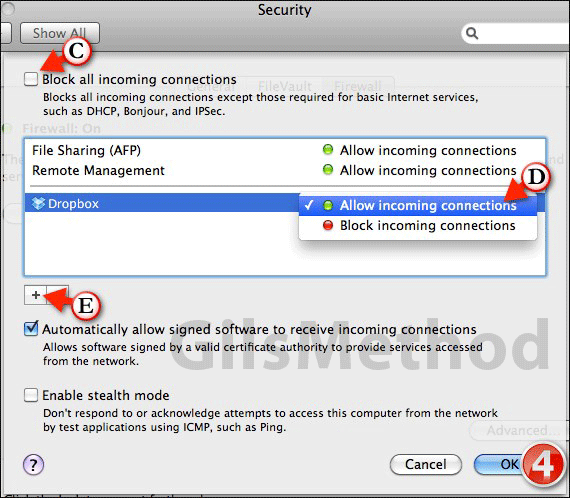
In this section you will have the ability to block all incoming connections to your Mac (the safest), customize how applications behave, and enable Stealth Mode.
C. To block all incoming connections to your Mac, check Block all incoming connections. Notice that basic Internet services like DHCP, Bonjour, and IPSec will not be blocked.
D. If an application is listed you can allow or block incoming connections by clicking the drop-down to the right of the application name. Choose the option you wish to use.
E. If the application you wish to control is not listed, click the Add application button [+] and select the application you wish to restrict with the firewall.
When enabled, Stealth Mode places your Mac in a mode where it does not respond to pings from the network and any other service that could potentially identify it on the network, it simply ignores those attempts.
When you are done configuring the firewall’s settings, click OK and close the window. If you have any comments or questions please use the comments form below.


